With Buttonizer it's possible to scroll to a specific section on your page. It's important to know that the element where you want to scroll to is unique and cannot appear twice on your page. Otherwise it will be impossible to link to your element.
You can link to an element with:
- an unique ID attribute
- an unique classname attribute
- a section (such as
header, footer, section)
Tip: Buttonizer will only search for selectors on the current page. It's not possible to reffer to an element on another page. You can use Page Rules to only show buttons on specific pages.
Usage
Finding the first element matching a class
In this example, the first element in the document with the class mysection is returned
.mysection
Complex selectors
In the following example, you can use complex selectors to select a specific section on your page. In this example, scroll to the login section
div.user-panel.main input[name='login']
Element ID's
In the following example, Buttonizer will search for an ID on the page
#section-name
Custom site or theme
Are you using Buttonizer on a custom website or theme? In this case, you'll identify the element manually using the class or id attribute.
<div id="demosection">The section where Buttonizer will scroll to</div>
If you want to use a class instead, the element could look like the following if it has multiple classnames:
<div class="originalclasses demosection">The section where Buttonizer will scroll to</div>
Finding an element to scroll to on a Shopify store
If you're using a custom theme, you can add the id or class attribute where you need Buttonizer to scroll to.
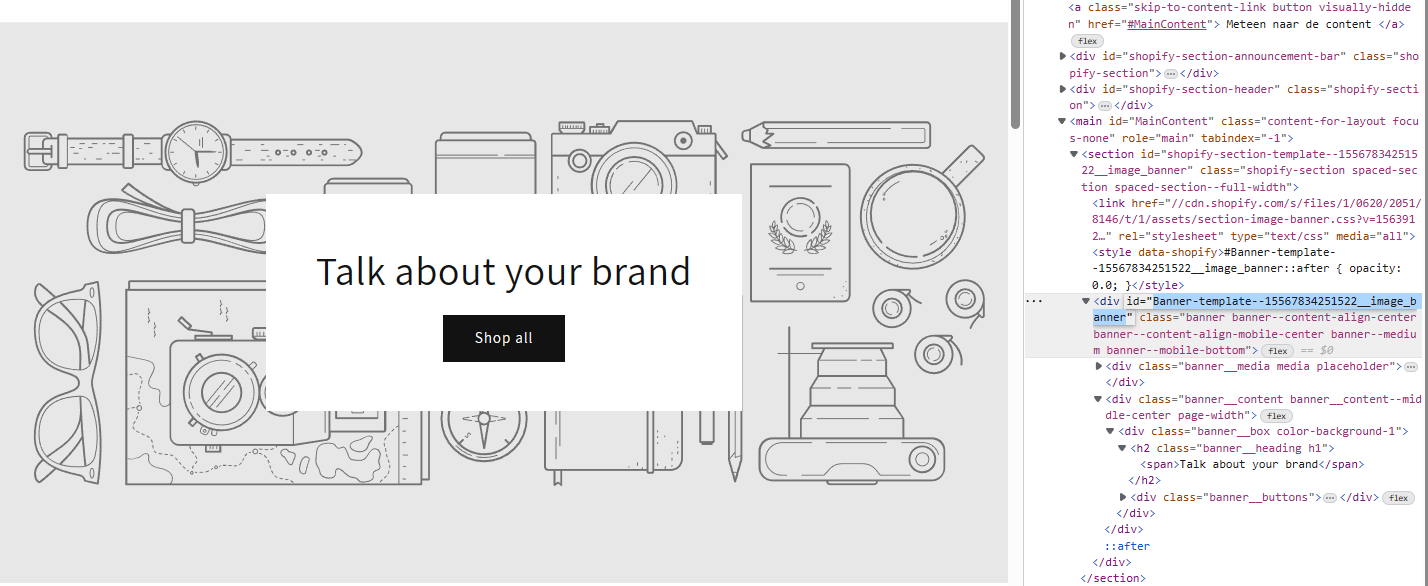
If you're not using a custom there, it's not possible to enter a custom ID or classname to a section through the customizer. In this case, you'll need to open your website, open the developer tools (for Windows users, F12) and find the element you want Buttonizer to scroll to.
For the section, you'll find elements with an unique id, for example shopify-section-template--15567834251522__image_banner. Enter this value inside Buttonizer. Since you're reffering to an ID, use the hastag as explained earlier. Example: #shopify-section-template--15567834251522__image_banner.

Using Page or Theme builders
If you're using Buttonizer on a platform, then you'll likely using a page builder. In this example we'll explain how you can create a section where Buttonizer will scroll to.
First, select a page where you want to identify an element and open the page via your pagebuilders editor.
In most cases, the ID-attribute is most suitable to set up since an ID should always unique on a page. For this example, enter demosection for the ID attribute. Now publish the changes you've made in your page builder.
Now, open Buttonizer, select the button, select the Scroll to section action and enter the following text:
#demosection
INFO: The # reffers to the ID attribute. If you have chosen for the CSS Class instead, you'll need to reffer to .demosection to reffer the class-attribute.
Publish your Buttonizer changes as well and wait for the changes to become visible on your site.
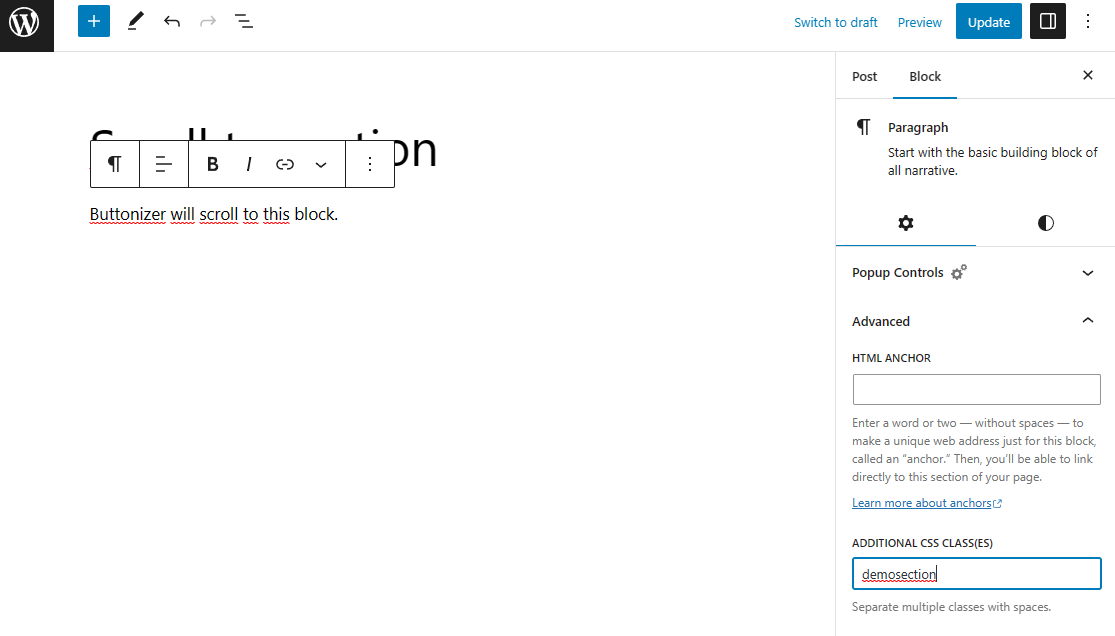
WordPress post (WordPress)
First, open a WordPress Post, create a section (such as a paragraph), select Advanced and enter the value inside ADDITIONAL CSS CLASS(ES). Inside Buttonizer, make sure to use the classname refferer you have set up.

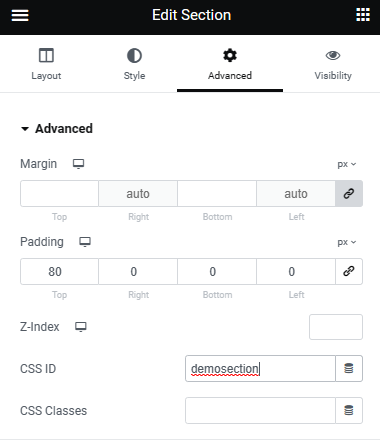
Elementor (WordPress)
First, open a page via Elementor and select the section you want to scroll to. Select the Advanced tab. You'll find CSS ID and CSS Classes.
