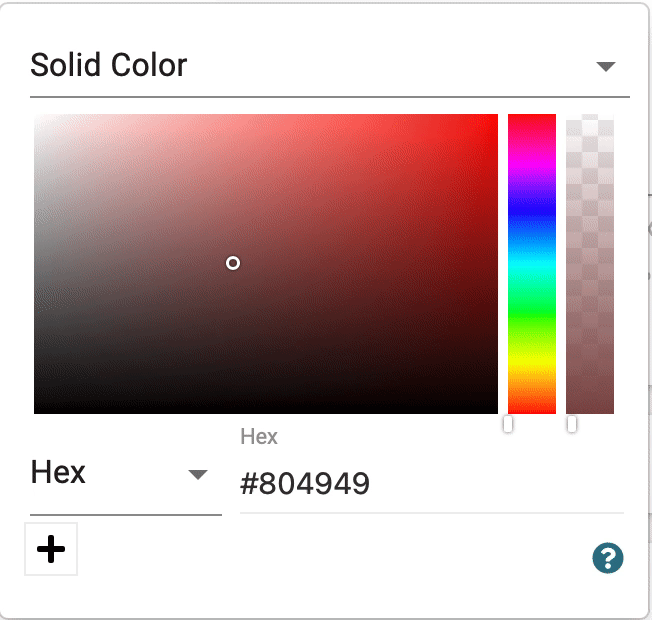
here here, we have a new picker!
Buttonizer 2.3 has brought a brand new color picker, with features such as linear and radial gradients, custom swatches and rgba text inputs! Read this article and you will know every little trick behind the Buttonizer color picker.
Overview
The new picker has the following parts to it, from top to bottom:
- A menu to select your color type: solid color, linear gradient or radial gradient.
- A standard color picker
- Hex or RGB input fields
- Swatches
See them in the image below, or check them out in your own Buttonizer picker!

Selecting a color can be done just like it used to work in the old picker using the saturation, hue and alpha sliders.
If you have a specific color you want to use and know the hex or rgb, you can enter them in the input fields below the sliders. Select HEX or RGB in the menu on the left, and input the corresponding values to the right.
Using swatches
Swatches can be really useful if you want to use the same color in multiple places in Buttonizer. Swatches can even be used in between different Buttonizer instances!
The swatches look like little rectangles. You will start out with no swatches, so you will just see a little rectangle with a plus icon in it. When you press this plus icon, you will save the currently selected color to your swatches. After adding a few different swatches, you can easily switch between the swatches by clicking them. This selects them as your current color. You will see a checkmark icon inside the selected swatch.
Removing swatches can be done by simply right-clicking the swatch that you want gone.

Creating a gradien
In the top menu of the color picker, you can choose a linear or radial gradient. See the difference in the picture below.

After choosing a gradient, you will see a bar has appeared below the color type menu. This bar represents your gradient colors and offsets. It starts out with 2 colors at each end.
Selecting one of the pointers will enable you to change that color, using the rest of the color picker, the rgb/hex input or one of the swatches.
Dragging the pointers changes the offsets, which can enable you to create a sharper or smoother gradient. Try dragging them both to the middle, and you will see you have created a very sharp gradient, which just becomes a line!
Clicking underneath the bar in an empty spot creates a new stop. You can change the color of this stop and create even more colors in your gradients!
If you have more than 2 color stops, you can drag one of them away from the bar to remove the stop.

The linear gradient has the option to change the angle of the gradient. This angle picker will be at the bottom of the picker. Drag the circle to find the perfect angle, and use the + and - to fine-tune it!
Try experimenting with our new picker to find the perfect color gradients for your buttons, and show your creations on the Buttonizer community!